> ## Documentation Index
> Fetch the complete documentation index at: https://docs.restate.dev/llms.txt
> Use this file to discover all available pages before exploring further.
# Getting Started with Restate Cloud
> Learn how to use Restate Cloud, the fully managed version of Restate.
Restate Cloud is a fully managed serverless version of Restate.
This allows you to focus on implementing your services, while Restate Cloud handles all aspects of availability and durability for your invocations, workflows, and state.
Learn more about what Restate Cloud has to offer and pricing plans.
Your services can run anywhere: on Kubernetes, as serverless functions, or in private environments.
Restate Cloud lets you connect your services securely, and provides a great local developer experience.
## Get started with the free tier
Restate Cloud offers a free tier that lets you get started quickly, with no credit card required.
Sign up for free and get started with Restate Cloud.
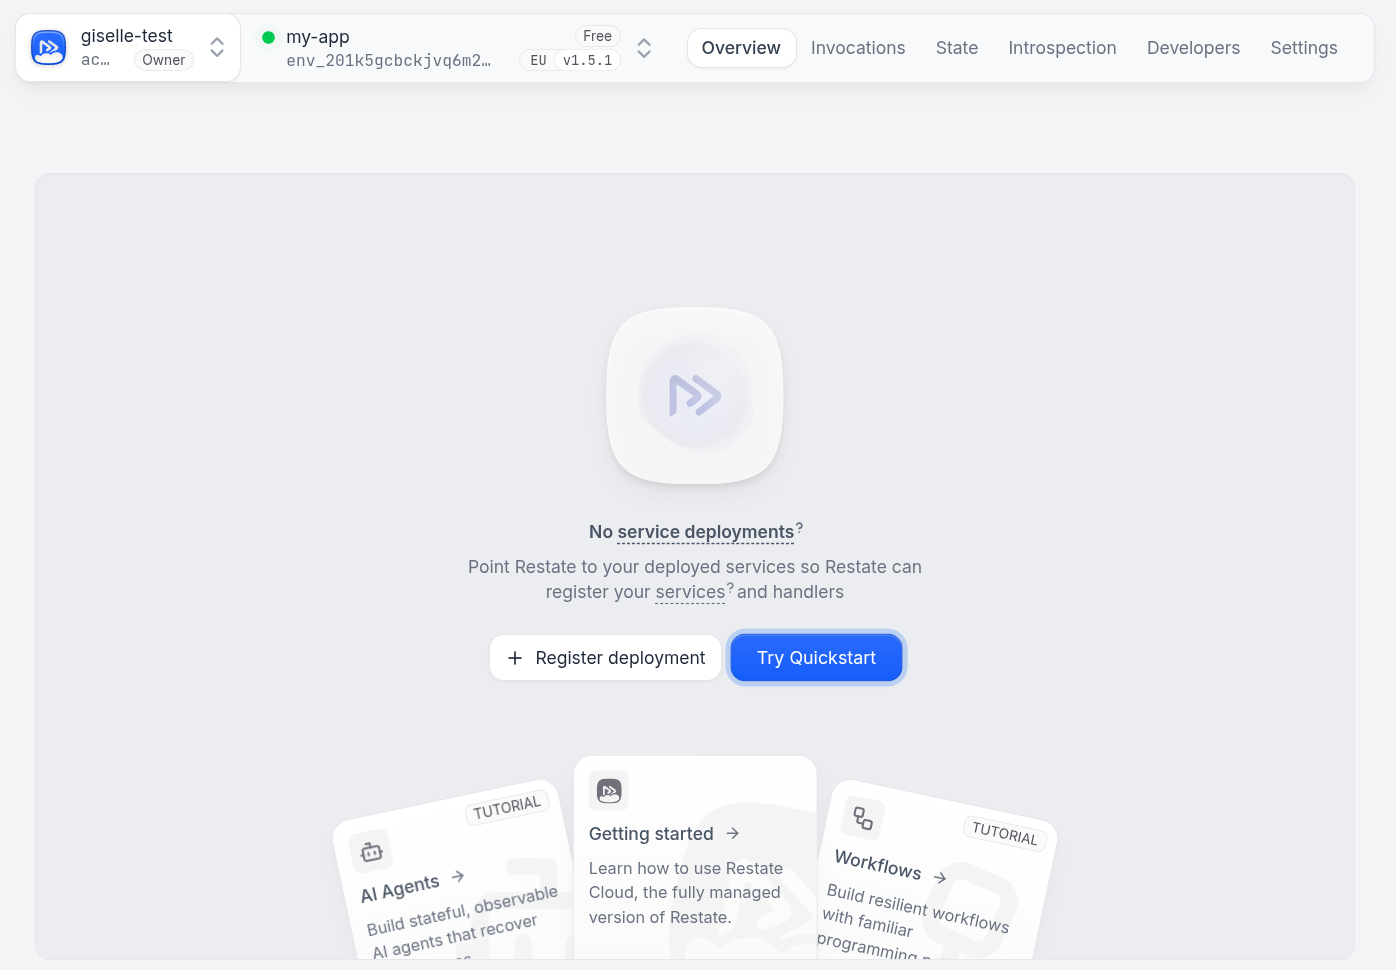
After signing up, you'll be prompted to create an account and an environment.
An environment is a unique Restate cluster instance, managed by Restate.
Once you have your environment set up, you can follow the quickstart tour to get a feeling for what Restate Cloud has to offer: register the example service, invoke it, and explore the Restate Cloud UI.
 ## Local development with Restate Cloud
You can start using your new environment straight away using the [Restate CLI](/installation#running-restate-server--cli-locally).
Log in to Restate Cloud:
```bash theme={null}
restate cloud login
```
Set up a new CLI profile for your environment:
```bash theme={null}
restate cloud env configure
```
Tell the CLI to use the new environment:
```bash theme={null}
restate config use-env
```
At any time, you can switch your CLI back to point to a Restate server running
on your machine with `restate config use-environment local` (see the
[CLI config docs](/references/cli-config#)).
After connecting the CLI to your environment, you can use the built-in tunnel feature to expose your local service to Restate Cloud.
For example to expose a service running on `localhost:9080`, run:
```bash theme={null}
restate cloud env tunnel --tunnel-name my-tunnel
restate deployments register --tunnel-name my-tunnel http://localhost:9080
```
To invoke your service locally via Restate Cloud, you can create a tunnel that tunnel exposes the ingress port of your Restate Cloud instance as if it was running on your machine:
```bash theme={null}
restate cloud env tunnel --remote-port 8080
```
Now you can call your service handlers over HTTP on `localhost:8080` (Restate Cloud's ingress port):
```bash theme={null}
curl localhost:8080/restate/call/MyService/myHandler
```
## Connecting Restate services to your environment
When using Restate Cloud, you can run your services anywhere: on Kubernetes, as serverless functions, on AWS Lambda, or in private environments. The only requirement is that your services need to be reachable from Restate Cloud’s infrastructure.
Have a look at the [docs on connecting services to Restate Cloud](/cloud/connecting-services) to learn how to connect your services to your Restate Cloud environment.
## Invoking services with API keys
To call your services from other apps or scripts, send HTTP requests to your environment’s ingress URL using your API key.
You can find the ingress URL in the Developers tab of the Cloud UI.
Usually it has the form `https://.env..restate.cloud:8080`, where the `` is your environment ID without the `env_` prefix, and `` is either `us` or `eu`.
To create an API key, go to the Developers tab in the Cloud UI.
Now you can call your service handlers by including the API Key as a Bearer token like this:
```bash theme={null}
curl -H "Authorization: Bearer $RESTATE_AUTH_TOKEN" https://201hy10cd3h6426jy80tb32n6en.env.us.restate.cloud:8080/restate/call/MyService/MyHandler
curl -H "Authorization: Bearer $RESTATE_AUTH_TOKEN" https://201hy10cd3h6426jy80tb32n6en.env.us.restate.cloud:9070/deployments
```
You can also use the CLI with this token:
```bash theme={null}
export RESTATE_HOST_SCHEME=https RESTATE_HOST=201hy10cd3h6426jy80tb32n6en.env.us.restate.cloud RESTATE_AUTH_TOKEN=$RESTATE_AUTH_TOKEN
restate whoami
```
You can use this approach for sending requests to the Admin API from scripts, CI pipelines, API gateways, or services that exist outside Restate.
## Local development with Restate Cloud
You can start using your new environment straight away using the [Restate CLI](/installation#running-restate-server--cli-locally).
Log in to Restate Cloud:
```bash theme={null}
restate cloud login
```
Set up a new CLI profile for your environment:
```bash theme={null}
restate cloud env configure
```
Tell the CLI to use the new environment:
```bash theme={null}
restate config use-env
```
At any time, you can switch your CLI back to point to a Restate server running
on your machine with `restate config use-environment local` (see the
[CLI config docs](/references/cli-config#)).
After connecting the CLI to your environment, you can use the built-in tunnel feature to expose your local service to Restate Cloud.
For example to expose a service running on `localhost:9080`, run:
```bash theme={null}
restate cloud env tunnel --tunnel-name my-tunnel
restate deployments register --tunnel-name my-tunnel http://localhost:9080
```
To invoke your service locally via Restate Cloud, you can create a tunnel that tunnel exposes the ingress port of your Restate Cloud instance as if it was running on your machine:
```bash theme={null}
restate cloud env tunnel --remote-port 8080
```
Now you can call your service handlers over HTTP on `localhost:8080` (Restate Cloud's ingress port):
```bash theme={null}
curl localhost:8080/restate/call/MyService/myHandler
```
## Connecting Restate services to your environment
When using Restate Cloud, you can run your services anywhere: on Kubernetes, as serverless functions, on AWS Lambda, or in private environments. The only requirement is that your services need to be reachable from Restate Cloud’s infrastructure.
Have a look at the [docs on connecting services to Restate Cloud](/cloud/connecting-services) to learn how to connect your services to your Restate Cloud environment.
## Invoking services with API keys
To call your services from other apps or scripts, send HTTP requests to your environment’s ingress URL using your API key.
You can find the ingress URL in the Developers tab of the Cloud UI.
Usually it has the form `https://.env..restate.cloud:8080`, where the `` is your environment ID without the `env_` prefix, and `` is either `us` or `eu`.
To create an API key, go to the Developers tab in the Cloud UI.
Now you can call your service handlers by including the API Key as a Bearer token like this:
```bash theme={null}
curl -H "Authorization: Bearer $RESTATE_AUTH_TOKEN" https://201hy10cd3h6426jy80tb32n6en.env.us.restate.cloud:8080/restate/call/MyService/MyHandler
curl -H "Authorization: Bearer $RESTATE_AUTH_TOKEN" https://201hy10cd3h6426jy80tb32n6en.env.us.restate.cloud:9070/deployments
```
You can also use the CLI with this token:
```bash theme={null}
export RESTATE_HOST_SCHEME=https RESTATE_HOST=201hy10cd3h6426jy80tb32n6en.env.us.restate.cloud RESTATE_AUTH_TOKEN=$RESTATE_AUTH_TOKEN
restate whoami
```
You can use this approach for sending requests to the Admin API from scripts, CI pipelines, API gateways, or services that exist outside Restate.