> ## Documentation Index
> Fetch the complete documentation index at: https://docs.restate.dev/llms.txt
> Use this file to discover all available pages before exploring further.
# Cloudflare Workers
> Run your TypeScript services on Cloudflare Workers
Deploy your Restate services on Cloudflare Workers.
This guide covers project configuration, service registration, and security setup.
Follow the [quickstart](/quickstart#cloudflare-workers) to try Cloudflare Workers and Restate locally.
## Set up your project
Start with the [cloudflare-workers-template](https://github.com/restatedev/cloudflare-workers-template) and follow its README.
Import the Restate SDK with the `fetch` component:
```typescript theme={null}
import * as restate from "@restatedev/restate-sdk-cloudflare-workers/fetch";
// Export the Restate handler
export default {
fetch: restate.createEndpointHandler({ services: [greeter] })
};
```
Make sure your `wrangler.toml` sets the `nodejs_compat` flag and enables preview urls:
```toml {"CODE_LOAD::https://raw.githubusercontent.com/restatedev/examples/refs/heads/main/typescript/templates/cloudflare-worker/wrangler.toml"} theme={null}
# The name of your Cloudflare Worker project
name = "restate-cloudflare-worker"
# Entrypoint
main = "./src/index.ts"
# Preview URLs are used to register to Restate
preview_urls = true
# Enable NodeJS compatibility (used by the SDK for the Node Buffer API)
# and Node's process.env (for logging)
compatibility_date = "2026-02-20"
compatibility_flags = [ "nodejs_compat" ]
```
## Local development
A Workers dev server can be started on port 9080 using:
```shell theme={null}
wrangler dev --port 9080
```
Register the service with Restate:
```shell theme={null}
npx @restatedev/restate deployments register --use-http1.1 http://localhost:9080
```
`wrangler` only supports HTTP/1.1 when running locally, so the `--use-http1.1` flag is required. This flag is not needed when deploying to Cloudflare Workers.
## Register the service to Restate
After deploying to Cloudflare Workers, [register the service](/services/versioning) with Restate CLI or UI providing [Preview URLs](https://developers.cloudflare.com/workers/configuration/previews/) to target specific service versions:
```shell theme={null}
npx @restatedev/restate deployments register \
https://-..workers.dev
```
You're set up. Head over to the **Overview page > Greeter > Playground** and start sending requests to your service.
## Restate identity keys (for Restate Cloud)
To allow only a specific Restate Cloud environment to send requests to your Cloudflare Workers deployment,
head over to your Restate Cloud Dashboard to set up Restate identity keys.
Set up Restate identity keys
## CI/CD Automation
To automatically deploy to Cloudflare Workers on each git commit to `main` and automatically register new [Restate service versions](/services/versioning):
```yml theme={null}
name: Deploy Worker
on:
push:
branches:
- main
jobs:
deploy:
runs-on: ubuntu-latest
timeout-minutes: 60
steps:
- uses: actions/checkout@v4
- uses: actions/setup-node@v5
- run: npm ci
- name: Build & Deploy Worker
uses: cloudflare/wrangler-action@v3
id: deploy
with:
# Check https://developers.cloudflare.com/workers/ci-cd/external-cicd/github-actions/
apiToken: ${{ secrets.CLOUDFLARE_API_TOKEN }}
accountId: ${{ secrets.CLOUDFLARE_ACCOUNT_ID }}
# Add a message to the deployment with the commit
command: versions upload --message "Deployed via GitHub Actions - commit ${{ github.sha }}"
- name: Get deployment URL
id: get-url
env:
WRANGLER_OUTPUT: ${{ steps.deploy.outputs.command-output }}
run: |
URL=$(echo "$WRANGLER_OUTPUT" | awk '/Version Preview URL:/ {gsub(/.*Version Preview URL: /, ""); print}')
echo "deployment-url=$URL" >> $GITHUB_OUTPUT
- name: Register Restate deployment
env:
RESTATE_ADMIN_URL: ${{ secrets.RESTATE_ADMIN_URL }}
RESTATE_AUTH_TOKEN: ${{ secrets.RESTATE_AUTH_TOKEN }}
run: npx -y @restatedev/restate deployment register -y ${{ steps.get-url.outputs.deployment-url }}
```
Make sure your Cloudflare Worker project exists. If it doesn't, create it with: `npx wrangler deploy`
For this workflow to execute, you need to add the following [**GitHub Actions repository secrets**](https://docs.github.com/en/actions/how-tos/write-workflows/choose-what-workflows-do/use-secrets):
* `CLOUDFLARE_ACCOUNT_ID`: Your Cloudflare Account. To get your account id, check [https://developers.cloudflare.com/workers/ci-cd/external-cicd/github-actions/#cloudflare-account-id](https://developers.cloudflare.com/workers/ci-cd/external-cicd/github-actions/#cloudflare-account-id)
* `CLOUDFLARE_API_TOKEN`: Your Cloudflare API token. To get a token, check [https://developers.cloudflare.com/workers/ci-cd/external-cicd/github-actions/](https://developers.cloudflare.com/workers/ci-cd/external-cicd/github-actions/)
* `RESTATE_ADMIN_URL`: The Admin URL. You can find it in [Developers > Admin URL](https://cloud.restate.dev/to/developers/integration#admin)
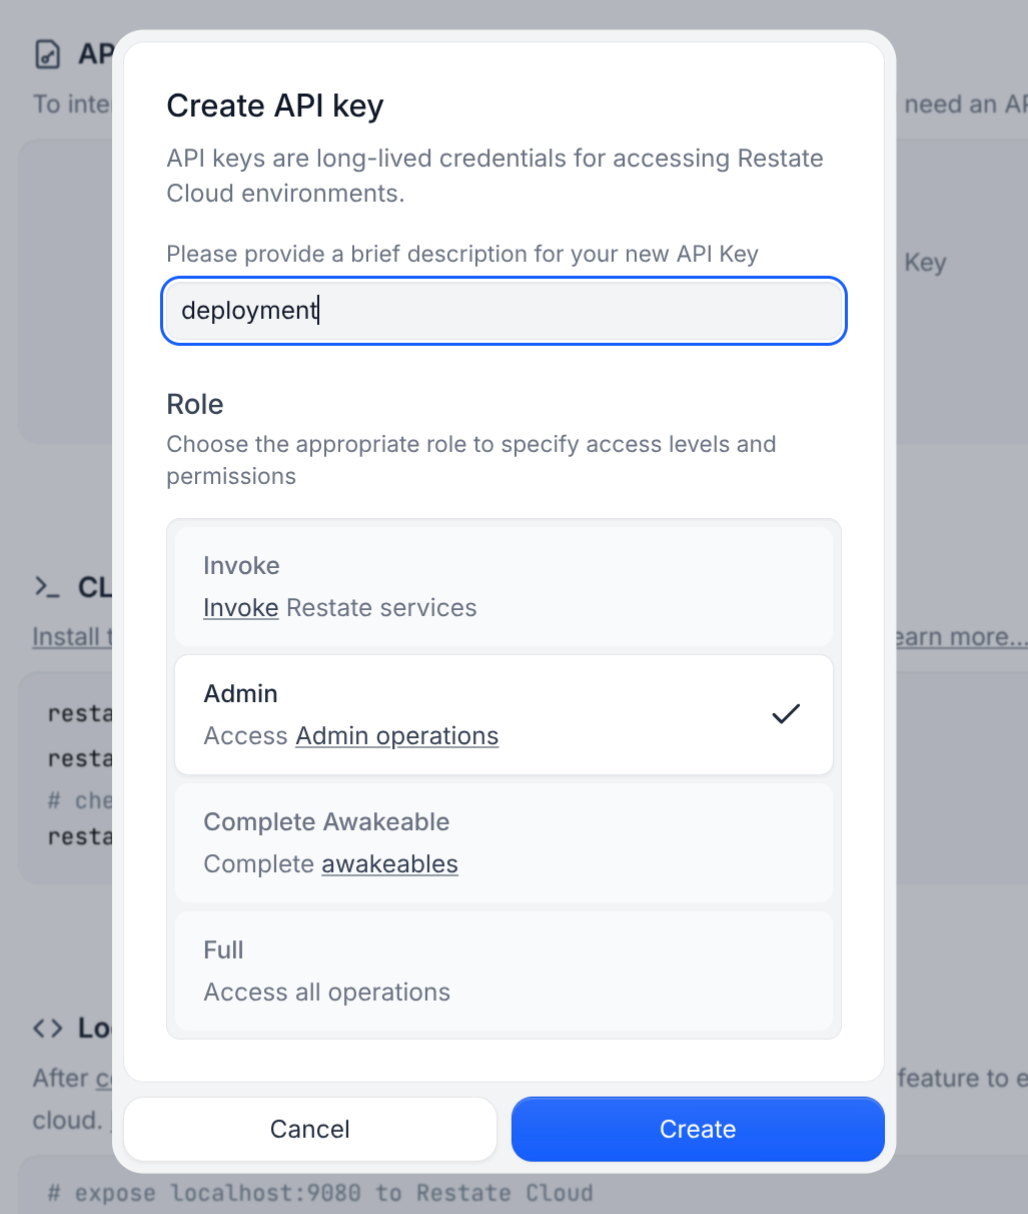
* `RESTATE_AUTH_TOKEN`: Your Restate Cloud auth token. To get one, go to [Developers > API Keys > Create API Key](https://cloud.restate.dev?createApiKey=true\&createApiKeyDescription=deployment-key\&createApiKeyRole=rst:role::AdminAccess), and make sure to select **Admin** for role
 You can use this workflow with Self-hosted Restate as well,
just make sure to correctly set up `RESTATE_AUTH_TOKEN` and `RESTATE_ADMIN_URL` to reach your Restate cluster.
You can use this workflow with Self-hosted Restate as well,
just make sure to correctly set up `RESTATE_AUTH_TOKEN` and `RESTATE_ADMIN_URL` to reach your Restate cluster.