> ## Documentation Index
> Fetch the complete documentation index at: https://docs.restate.dev/llms.txt
> Use this file to discover all available pages before exploring further.
# Vercel
> Run your TypeScript services on Vercel
export const CustomVars = ({name}) => {
const RESTATE_VERSION = "1.7";
const TYPESCRIPT_SDK_VERSION = "1.16.1";
const JAVA_SDK_VERSION = "2.9.0";
const GO_SDK_VERSION = "1.0.1";
const PYTHON_SDK_VERSION = "1.0.1";
const RUST_SDK_VERSION = "0.10.0";
const mapping = {
RESTATE_VERSION,
TYPESCRIPT_SDK_VERSION,
JAVA_SDK_VERSION,
GO_SDK_VERSION,
PYTHON_SDK_VERSION,
RUST_SDK_VERSION,
JAVA_HTTP_DEPENDENCY: `dev.restate:sdk-java-http:${JAVA_SDK_VERSION}`,
KOTLIN_HTTP_DEPENDENCY: `dev.restate:sdk-kotlin-http:${JAVA_SDK_VERSION}`,
JAVA_LAMBDA_DEPENDENCY: `dev.restate:sdk-java-lambda:${JAVA_SDK_VERSION}`,
KOTLIN_LAMBDA_DEPENDENCY: `dev.restate:sdk-kotlin-lambda:${JAVA_SDK_VERSION}`,
JAVA_SDK_REQUEST_IDENTITY: `dev.restate:sdk-request-identity:${JAVA_SDK_VERSION}`,
JAVA_TESTING: `dev.restate:sdk-testing:${JAVA_SDK_VERSION}`,
JAVA_CLIENT: `dev.restate:client:${JAVA_SDK_VERSION}`,
KOTLIN_CLIENT: `dev.restate:client-kotlin:${JAVA_SDK_VERSION}`,
DENO_FETCH: `npm:@restatedev/restate-sdk@^${TYPESCRIPT_SDK_VERSION}/fetch`
};
return mapping[name];
};
Deploy your Restate services on Vercel.
This guide covers project configuration, service registration, and security setup.
Follow the [quickstart](/quickstart) to try Next.js and Restate locally.
## Set up your project
Start from the [vercel-template](https://github.com/restatedev/vercel-template).
Create a `fetch` endpoint, providing the services:
```typescript {"CODE_LOAD::https://raw.githubusercontent.com/restatedev/examples/refs/heads/main/typescript/templates/vercel/src/restate/serve.ts"} theme={null}
import * as restate from "@restatedev/restate-sdk/fetch";
import { greeter } from "@/restate/greeter";
// Create the Restate endpoint.
// Here you need to register your services
const endpoint = restate.createEndpointHandler({ services: [greeter] });
// Adapt it to Next.js route handlers
export const serve = () => {
return {
POST: (req: Request) => endpoint(req),
GET: (req: Request) => endpoint(req),
};
};
```
And expose the endpoint in a Next.js parameterized route, e.g. `/restate/[[...services]]`:
```typescript {"CODE_LOAD::https://raw.githubusercontent.com/restatedev/examples/refs/heads/main/typescript/templates/vercel/src/app/restate/%5B%5B...services%5D%5D/route.ts"} theme={null}
import { serve } from "@/restate/serve";
// This is the route that exposes the Restate services.
// You can register it to Restate using /restate subpath (check the README)
// To call it, open Restate > Overview > Greeter > Playground
export const { GET, POST } = serve();
```
## Configure Vercel project
With the GitHub repository set up, go over to [the Vercel dashboard](https://vercel.com/new) to create the project.
For Restate to push requests to the Vercel project, you need Vercel Generated URLs to be accessible by Restate.
You have two alternatives:
* Disable [Vercel Authentication](https://vercel.com/docs/security/deployment-protection/methods-to-protect-deployments/vercel-authentication) for the project, making its URLs publicly accessible.
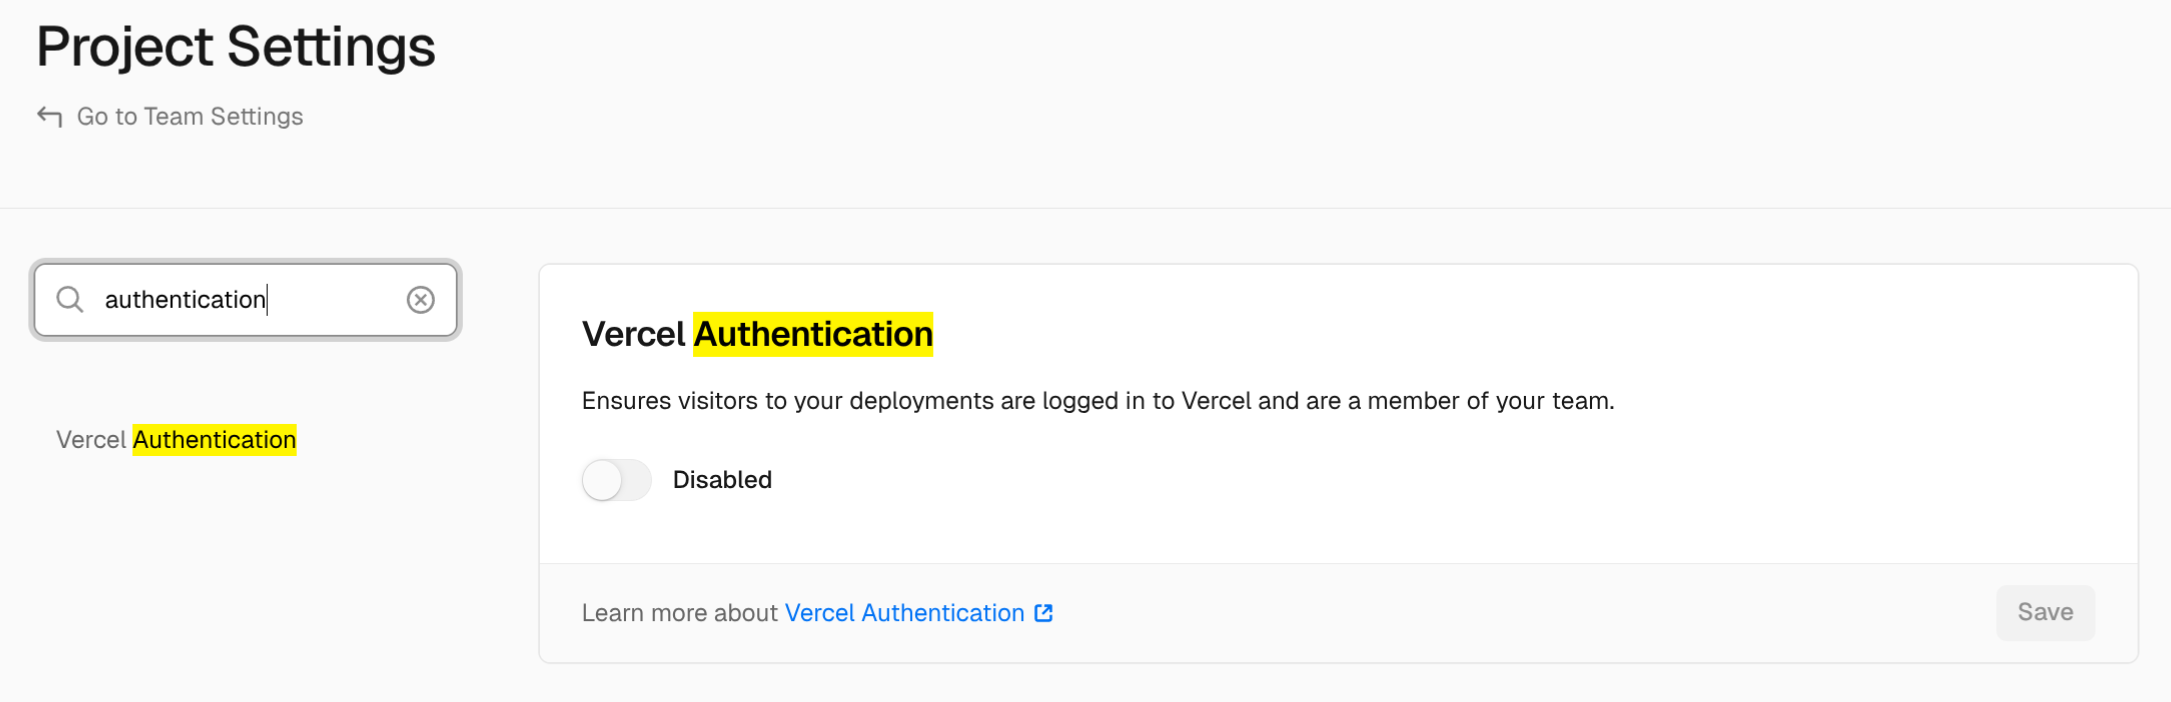 * Enable [Protection Bypass for Automation](https://vercel.com/docs/deployment-protection/methods-to-bypass-deployment-protection/protection-bypass-automation). This makes the URLs accessible only if the `x-vercel-protection-bypass` header is provided with the right value.
## Register the service to Restate
In order for Restate to push requests to your services, you need to [register the service to Restate](/services/versioning) using the CLI or UI.
Make sure to register the [Commit URL](https://vercel.com/docs/deployments/generated-urls#generated-from-git) so that Restate can address specific Vercel deployments:
```shell theme={null}
npx @restatedev/restate deployments register \
--use-http1.1 \
https://--.vercel.app/restate
```
`--use-http1.1` is required to interact with Next.js projects.
If you set up **Protection Bypass for Automation** as described above, pass the additional header as an argument:
```shell theme={null}
npx @restatedev/restate deployments register \
--use-http1.1 \
--extra-header x-vercel-protection-bypass= \
https://--.vercel.app/restate
```
You're set up. Head over to the **Overview page > Greeter > Playground** and start sending requests to your service.
## Restate identity keys (for Restate Cloud)
In order to make sure only a specific Restate Cloud environment can push requests to your Vercel deployment,
head over to your Restate Cloud Dashboard to set up Restate identity keys.
Set up Restate identity keys
## CI/CD Automation
You can set up automation to automatically register new [Restate service versions](/services/versioning) every time a Vercel deployment gets promoted:
```yml theme={null}
name: Register to Restate
# React to vercel.deployment.promoted event
on:
repository_dispatch:
types:
- 'vercel.deployment.promoted'
jobs:
deploy-to-restate:
if: github.event_name == 'repository_dispatch'
runs-on: ubuntu-latest
steps:
- name: Register Restate deployment
env:
# In your Restate Cloud dashboard, go to Developers > API Keys > Create API Key, and make sure to select **Admin** for the role
RESTATE_ADMIN_URL: ${{ secrets.RESTATE_ADMIN_URL }}
# You can find this out in Developers > Admin URL.
RESTATE_AUTH_TOKEN: ${{ secrets.RESTATE_AUTH_TOKEN }}
# Run service registration
run: |
npx -y @restatedev/restate deployment register -y \
--use-http1.1 \
${{ secrets.VERCEL_PROTECTION_BYPASS_TOKEN && format('--extra-header x-vercel-protection-bypass={0}', secrets.VERCEL_PROTECTION_BYPASS_TOKEN) }} \
${{ github.event.client_payload.url }}/restate
```
For this workflow to execute, you need to add the following [**GitHub Actions repository secrets**](https://docs.github.com/en/actions/how-tos/write-workflows/choose-what-workflows-do/use-secrets):
* `RESTATE_ADMIN_URL`: The Admin URL. You can find it in [Developers > Admin URL](https://cloud.restate.dev/to/developers/integration#admin)
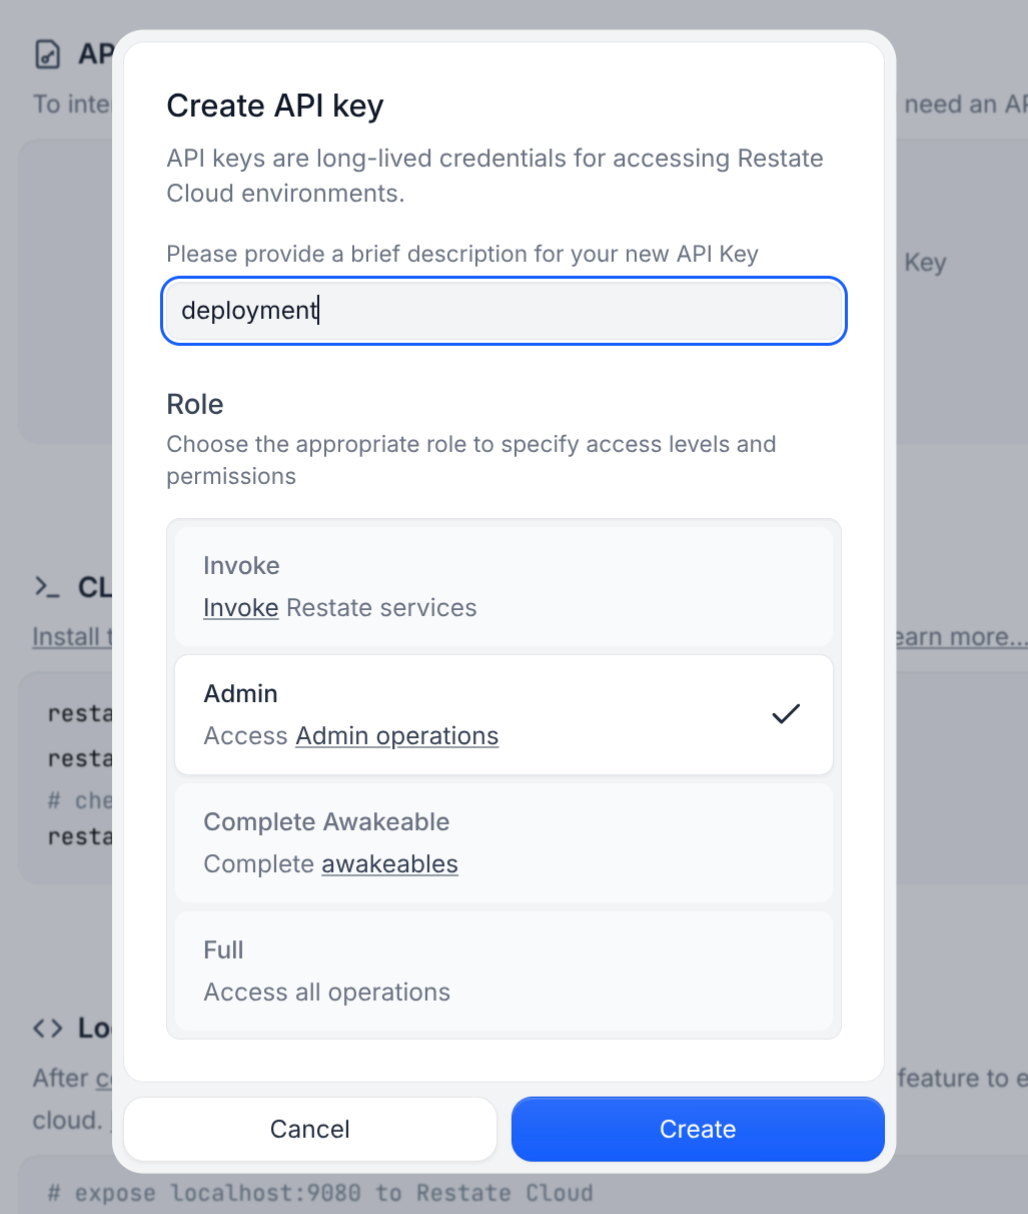
* `RESTATE_AUTH_TOKEN`: Your Restate Cloud auth token. To get one, go to [Developers > API Keys > Create API Key](https://cloud.restate.dev/to/developers/integration?createApiKey=true\&createApiKeyDescription=deployment-key\&createApiKeyRole=rst:role::AdminAccess), and make sure to select **Admin** for the role
* Enable [Protection Bypass for Automation](https://vercel.com/docs/deployment-protection/methods-to-bypass-deployment-protection/protection-bypass-automation). This makes the URLs accessible only if the `x-vercel-protection-bypass` header is provided with the right value.
## Register the service to Restate
In order for Restate to push requests to your services, you need to [register the service to Restate](/services/versioning) using the CLI or UI.
Make sure to register the [Commit URL](https://vercel.com/docs/deployments/generated-urls#generated-from-git) so that Restate can address specific Vercel deployments:
```shell theme={null}
npx @restatedev/restate deployments register \
--use-http1.1 \
https://--.vercel.app/restate
```
`--use-http1.1` is required to interact with Next.js projects.
If you set up **Protection Bypass for Automation** as described above, pass the additional header as an argument:
```shell theme={null}
npx @restatedev/restate deployments register \
--use-http1.1 \
--extra-header x-vercel-protection-bypass= \
https://--.vercel.app/restate
```
You're set up. Head over to the **Overview page > Greeter > Playground** and start sending requests to your service.
## Restate identity keys (for Restate Cloud)
In order to make sure only a specific Restate Cloud environment can push requests to your Vercel deployment,
head over to your Restate Cloud Dashboard to set up Restate identity keys.
Set up Restate identity keys
## CI/CD Automation
You can set up automation to automatically register new [Restate service versions](/services/versioning) every time a Vercel deployment gets promoted:
```yml theme={null}
name: Register to Restate
# React to vercel.deployment.promoted event
on:
repository_dispatch:
types:
- 'vercel.deployment.promoted'
jobs:
deploy-to-restate:
if: github.event_name == 'repository_dispatch'
runs-on: ubuntu-latest
steps:
- name: Register Restate deployment
env:
# In your Restate Cloud dashboard, go to Developers > API Keys > Create API Key, and make sure to select **Admin** for the role
RESTATE_ADMIN_URL: ${{ secrets.RESTATE_ADMIN_URL }}
# You can find this out in Developers > Admin URL.
RESTATE_AUTH_TOKEN: ${{ secrets.RESTATE_AUTH_TOKEN }}
# Run service registration
run: |
npx -y @restatedev/restate deployment register -y \
--use-http1.1 \
${{ secrets.VERCEL_PROTECTION_BYPASS_TOKEN && format('--extra-header x-vercel-protection-bypass={0}', secrets.VERCEL_PROTECTION_BYPASS_TOKEN) }} \
${{ github.event.client_payload.url }}/restate
```
For this workflow to execute, you need to add the following [**GitHub Actions repository secrets**](https://docs.github.com/en/actions/how-tos/write-workflows/choose-what-workflows-do/use-secrets):
* `RESTATE_ADMIN_URL`: The Admin URL. You can find it in [Developers > Admin URL](https://cloud.restate.dev/to/developers/integration#admin)
* `RESTATE_AUTH_TOKEN`: Your Restate Cloud auth token. To get one, go to [Developers > API Keys > Create API Key](https://cloud.restate.dev/to/developers/integration?createApiKey=true\&createApiKeyDescription=deployment-key\&createApiKeyRole=rst:role::AdminAccess), and make sure to select **Admin** for the role
 * If you set up the Protection Bypass for Automation as described above, add the secret `VERCEL_PROTECTION_BYPASS_TOKEN` with the token value
You can use this workflow with Self-hosted Restate as well,
just make sure to correctly set up `RESTATE_AUTH_TOKEN` and `RESTATE_ADMIN_URL` to reach your Restate cluster.
* If you set up the Protection Bypass for Automation as described above, add the secret `VERCEL_PROTECTION_BYPASS_TOKEN` with the token value
You can use this workflow with Self-hosted Restate as well,
just make sure to correctly set up `RESTATE_AUTH_TOKEN` and `RESTATE_ADMIN_URL` to reach your Restate cluster.